This blog has been compensated by Collective Bias, Inc. and its advertiser. All opinions are mine alone. #GIVEEXTRAGETEXTRA #Walmart #CollectiveBias
There are two items I am always digging in the bottom of my bag to find: my keys and my gum. So I created a solution to easily fish both out. With this tutorial you can, too!
I have a large, wide-mouth tote with no interior dividers and one small pocket. I love the ease of which I can find organized individual pouches, and notebooks, and my writstlet (with wallet), plus whatever I need for The Peanut within the bag, but my keys and my gum are always sinking to the bottom. This is a problem. I need my gum.
The smell of spearmint will always remind me of my dad, ever since I pilfered his change drawer daily for school lunch money. That's where he kept his ever present pack of gum. And I clearly inherited the habit; I am never without a pack. These days a stick of gum is my cue that a meal is at an end. Of course if I'm out with friends I share. The new Extra® 35-stick pack is perfect for sharing -- you get so much more than a typical pack of gum, so you can give more -- and perfect for my Fob Plus. The pack is in this fantastic hard recycled plastic case. Now I'm no longer diving into the bottom of my bag for a smooshed flat package, but rather, I'm using the Extended Fob to pull up this durable case.* Love it!
I found the Extra® 35-stick packs at my local Walmart (a stone's throw from my house -- dangerously stocked with a fabric section I can't seem to avoid). The gum was in the check out lanes as you'd expect, on the top shelf. I grabbed one of each, Extra® Gum Spearmint for my bag and Extra® Gum Polar Ice® for my desk.
Go out grab a pack for yourself along with the rest of the supplies and get ready to sew an Extended Key Fob Plus. This tutorial includes clear step-by-step directions to sew a loop-around fob easily hooked on to the handle of your favorite bag. Attach a large pack of gum (or a small wallet) with the wide elastic end loop! If you’re like me and prefer to print out the tutorials you use, download the 3-page PDF version here for just $1.99! Otherwise, read on to connect your keys (plus gum!) to a bag strap with this quick sew.
MATERIALS & CUTTING
The dimensions listed here will create a final Extended Key Fob Plus, 1″ wide by 10″ long (including the Elastic End-Loop). You can easily change these dimensions to fit your needs.
- Indoor/Outdoor Fabric* for Strap, 2″ x 12 ½″
- Coordinating Two-Inch Wide Braided Elastic, 9″ (will be visible in final project)
- D-Ring, 1 ½″ [affiliate link]
- Swivel Clasp, 1” [affiliate link] Note: This clasp must fit through the d-ring.
- Heavy Duty Needle
- Coordinating Thread
*Alternatively, you can use a quilting cotton of your choice backed with a heavy-duty iron-on interfacing. I prefer the durability of the indoor/outdoor canvas. Don’t forget to check the remnant bin of your favorite fabric store if you don’t have any indoor/outdoor scraps in your stash!
CONSTRUCTION
1 Working wrong sides together, fold ½″ on long (12 ½″) edge of the Strap. Repeat on opposite edge so that both edges meet in the middle.
2 Edge-stitch along the fold on both sides of the Strap. At this point the Strap should be 1″ wide with raw edges meeting in the center, yet still visible, on the back side.
3 Finish both of the short (1″) ends of the Strap with the finishing method of your choice [zig-zag stitch, trim with pinking shears, or serge (pictured)].
 |
| Steps 2 & 3 |
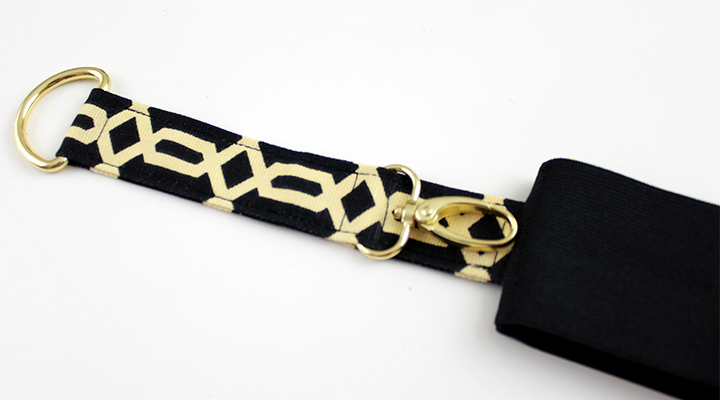
4 Thread the D-Ring and the Swivel Hook on to the Strap so that the flat edges are positioned on the back of the Strap (where the raw edges meet) and the curved side of the D-Ring and the Swivel Hook are on the front of the Strap.
5 Fold the Strap in half back sides together so that it measures 1″ wide by 5 ¼″ long; align the two short ends together.
6 Center the short ends of the Strap with one short end of the Elastic Loop, aligning all three edges; pin in place. Bring up the opposite end of the Loop and align it on top; pin all four edges together. Stitch across the full width of the elastic with a ¼″ seam allowance.
 |
| Steps 5 & 6 |
7 Working inside the Loop with a zig-zag stitch, sew the raw ends of the elastic down on to the Loop catching the edges of the Strap as you stitch.
 |
| Step 7 |
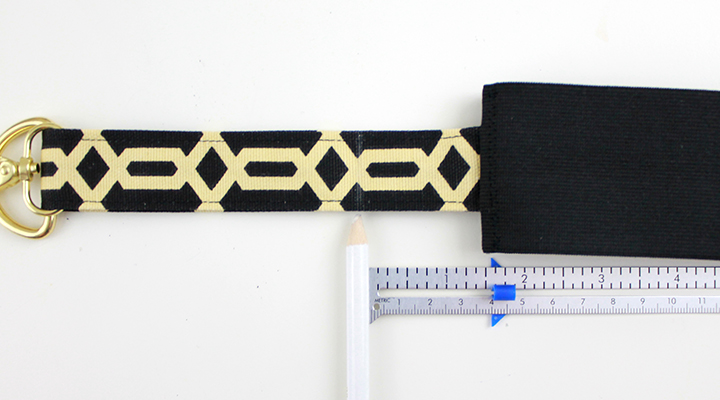
8 On the outside of the Strap, mark 1 ½″ up from the Elastic Loop. Beginning at the Loop, edge stitch up one side of the Strap on top of previous edge stitch to the mark, pivot and stitch across the Strap at the mark, pivot and edge stitch on top of previous edge to the Loop, pivot and edge stitch across the Strap ending where you began. Finish off threads.
 |
| Step 8 |
9 Slide the Swivel Hook down the strap until it is tight against the horizontal stitch line of Step 9; pin in place. Slide the D-Ring to the top of the Strap ensuring the Strap remains flat; pin in place.
10 Working between the D-Ring and Swivel Hook and on top of previous edge stitching, edge stitch up to the D-Ring, pivot and stitch across the Strap tight against the D-Ring, pivot and edge stitch down the strap to the Swivel Hook, pivot and stitch across the strap tight against the Swivel Hook, pivot and edge stitch to the starting point. Finish off threads.
 |
| Step 10 |
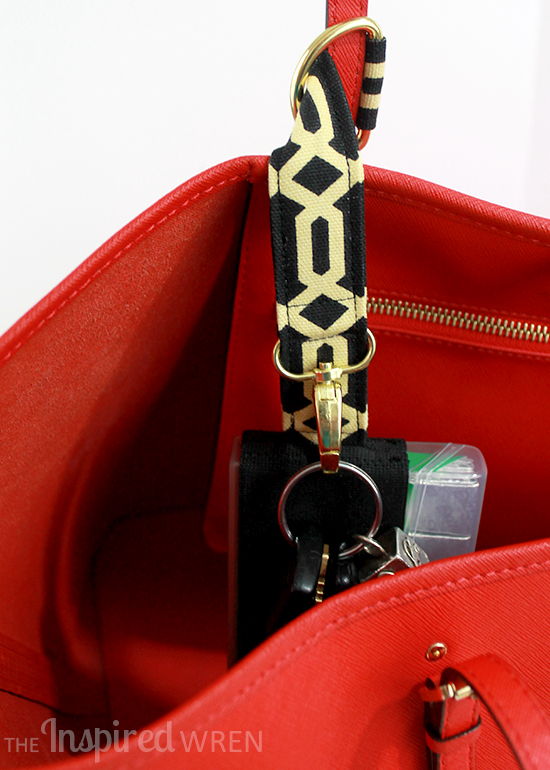
11 With no keys or gum attached, wrap the Strap around the handle of your favorite bag and feed the Loop and Strap through the D-Ring. Pop your gum* into the elastic loop, hook your keys on the hook, and drop them all into your bag. Easily fish them all out with one pull on the Strap of the Fob!
*See what I did there? Pop! Like bubble gum.
YOU'RE DONE!
Thanks to the Indoor/Outdoor fabric this Extended Key Fob Plus can tolerate a lot of handling without fraying or fading. The Fob is designed to stay in place attached to your bag’s handle – no long strap tickling your leg as you drive or tangling among the grocery bags you carry. Hook and unhook your keys as needed!
The Plus on this Extended Fob is the Elastic Loop: perfect for a large pack of hard-cased gum or a small wallet. Gum not your thing? Think of all the discount, library, and business cards you could put in that hard case instead! Or band aids and antibiotic ointment! Or even a mini sewing kit!
If you use this tutorial, I’d love to see and hear about your results. Come share your projects on The Inspired Wren “Share” page. There you can link up your original images from a blog, Flickr, Pinterest, or Instagram.
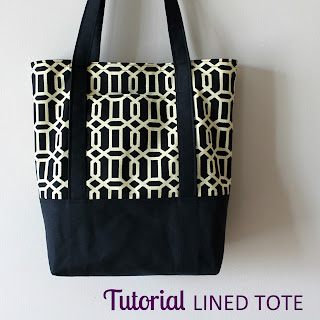
PS -- Thanks for reading to the end. Of course, now you need a bag to hang your new Extended Key Fob Plus on! Try the 3-10 Tote or the Lined Canvas Tote sewn in coordinating fabric for a perfect set. ~Ren
Ren Murphy writes for The Inspired Wren.
___________________________________________________
You should really see all that goes into each project!
From my marathon sewing sessions, to all that I do when I #shouldhavebeensewing catch daily updates on Instagram (and Flickr) of works-in-progress. Get that behind the scenes view you’re looking for, and sneak peeks of upcoming tutorials, too.
___________________________________________________
The Inspired Wren is a participant in the Amazon Services LLC Associates Program, an affiliate advertising program designed to provide a means for sites to earn advertising fees by advertising and linking to amazon.com.


